We have a new mobile friendly website! We are in the process of updating it with more of our personalized floral content, so please be patient with us! To see more of our work please peruse this blog, set up a consultation and/or Like us on Faceboook: https://www.facebook.com/elementsinbloom/?fref=ts

Wednesday, February 17, 2016
Sunday, March 9, 2014
Real Weddings: Kimberly + Michael 12.8.12
We recently got these sweet photos from our Bride Kimberly from her December 2012 wedding. Such a timeless color palette of soft creams and blush pinks. A color palette you just can't go wrong with and you'll never look back and say, "Ugh, what was I thinking with that!" :-)
Kimberly and Michael had an evening wedding that took place at The Arctic Club Hotel. Her style for the event was classic, yet modern with winter touches. Absolutely beautiful!


Classic design of her bouquet containing Hydrangeas, Roses and Carnations. Wrap embellished with her parents wedding rings... a sentimental and meaningful touch.

Row of white & blush pink Bridesmaids bouquets

Centerpieces of White Hydrangea, Blush Pink Roses & White Carnations with little to no greenery.

Cocktail tables with simple glass cylinders with submerged Bear Grass and a floating candle

The Flower Girl carried a
White Carnation pomander ball and the Rinbearer carried this cute pillow made from White Carnations
White Carnation pomander ball and the Rinbearer carried this cute pillow made from White Carnations
Her photographer Tasha Owen captured some great shots for us! Thank you.
Sunday, January 26, 2014
Real Weddings: Denise & Brian
It's been awhile since I've blogged and I'm trying to get back in the swing of things. We aren't doing as much work as we have in the past since 2 little one's keep me pretty busy at home. But, I still want to share the work we are doing!
Here's one from 2012 that we recently got images from. Denise & Brian were an edgy couple that loved the northwest. So that was the theme for their wedding and we tried to embody that into the flowers.
This elegant wedding was held at The Four Seasons Hotel in Seattle
Enjoy!


Here's one from 2012 that we recently got images from. Denise & Brian were an edgy couple that loved the northwest. So that was the theme for their wedding and we tried to embody that into the flowers.
This elegant wedding was held at The Four Seasons Hotel in Seattle
Enjoy!
The Ceremony was designed with trios at the altar to create a sophisticated but not overly dramatic ceremony setting. We incorporated the atrium design from the centerpieces into one of the pieces that went into the trio. Flowers used to design were Hydrangeas, Orchids, Roses and Willow.
The table centerpieces were simple and elegant with a woodsy feel. Atrium style with what appears to be a planted Phaleonopsis orchid in rocks, pebbles, dirt and moss
The place card table embodied true Northwest feel. With birch logs to hold the place cards we designed 3 "planted" Phaleonopsis Orchid pieces with wrapped tea leaves, cymbidium orchids, moss and pebbles.
The Bride carried a simple yet unique bouquet designed with Phaleonopsis Orchids, Cymbidium Orchids, Wrapped leaves, Willow and Antherium
The cocktail tables had simple fern curl, greenery and orchid pieces designed in wrapped birch pots
The cake was simply and elegantly designed with Phaleonopsis Orchids on top and bottom
Monday, November 25, 2013
Elements in Bloom is still in business!
I just wanted to update my blog letting anyone who ends up here from my website or from other search engines that we are still in business and doing weddings and events. I have not blogged since 2012 because I had 2 babies back to back and was busy with that business and hadn't had the time to focus efforts on blogging for this business.
We are still going strong, just a little lighter these days with events. We only take one event per day so book your date early!
We have albums of updated work for our consultations and I will making an effort to start adding some updated work to the blog and to the website.
Thank you for your understanding and patience!
Thursday, March 29, 2012
Featured...
A Wedding that we worked on about a year ago has been featured on another wedding blog! It's always so wonderful to see our work topic of others conversation.
Laura & Trevor, married March 26, 2011 Happy Anniversary!

Check it out here!
Venue: The Arctic Club Hotel
Photographer: Emma Jane Photography
Coordination: Perfect Harmony Events
DJ: Wave Link Music
Wednesday, March 21, 2012
Real Weddings: Jen & Brian
As I've said recently I'm catching up on my blogging. Just like my albums and website there's a lot of gorgeous weddings from 2010 and 2011 that I haven't taken the time to feature. They are too good to keep secret so I'm sharing them now.
Jen and Brian are good friends of mine. I've known Jen since 8th grade and we've been friends ever since. I couldn't pick a better guy for her. Brian is such a genuine person and has welcomed her son into his life as part of the family. It was truly an honor to do flowers for their wedding day.
They were married at A Country Location in Arlington on 7.17.10. Such a beautiful country style outdoor setting. We combined Jen's modern taste with a natural setting. Love the rich orange and brown tones.


Orange rose petals scattered along the grass aisle-way. Shepherd hooks with hanging Pomander balls in rich orange tones accented the aisle-way.

The natural vine arch had different sized green and orange Pomander balls hanging from it

The Bride carried a bouquet of Roses, Mokara Orchids, Mini Calla Lillies, Phaleonopsis Orchids, Fern Curls and Spray Roses

Whites, champagnes, soft peaches and salmon orange created a subtle color for her bouquet with a gorgeous creaminess

Makeup and hair by Glamour with Grace, Elyssa Boyd

The Bridesmaids carried rich and colorful bouquets of orange and chartreuse green. A combination of Mini Calla Lillies, Roses, Spray Roses, Protea, Orchids, Fern Curls and Brazillia berry.

A nice contrast to their chocolate brown dresses

Simple arrangements of submerged Tulips and Orchids


The kid's tables had fun centerpieces of wheat grass with lollipops growing out of them. An unusual centerpiece, but also a favor/treat for the kiddos

The cake was done by a family friend, delicious and beautiful
Thank you to Red Fish Blue Fish Photography for the beautiful photos!
Tuesday, March 20, 2012
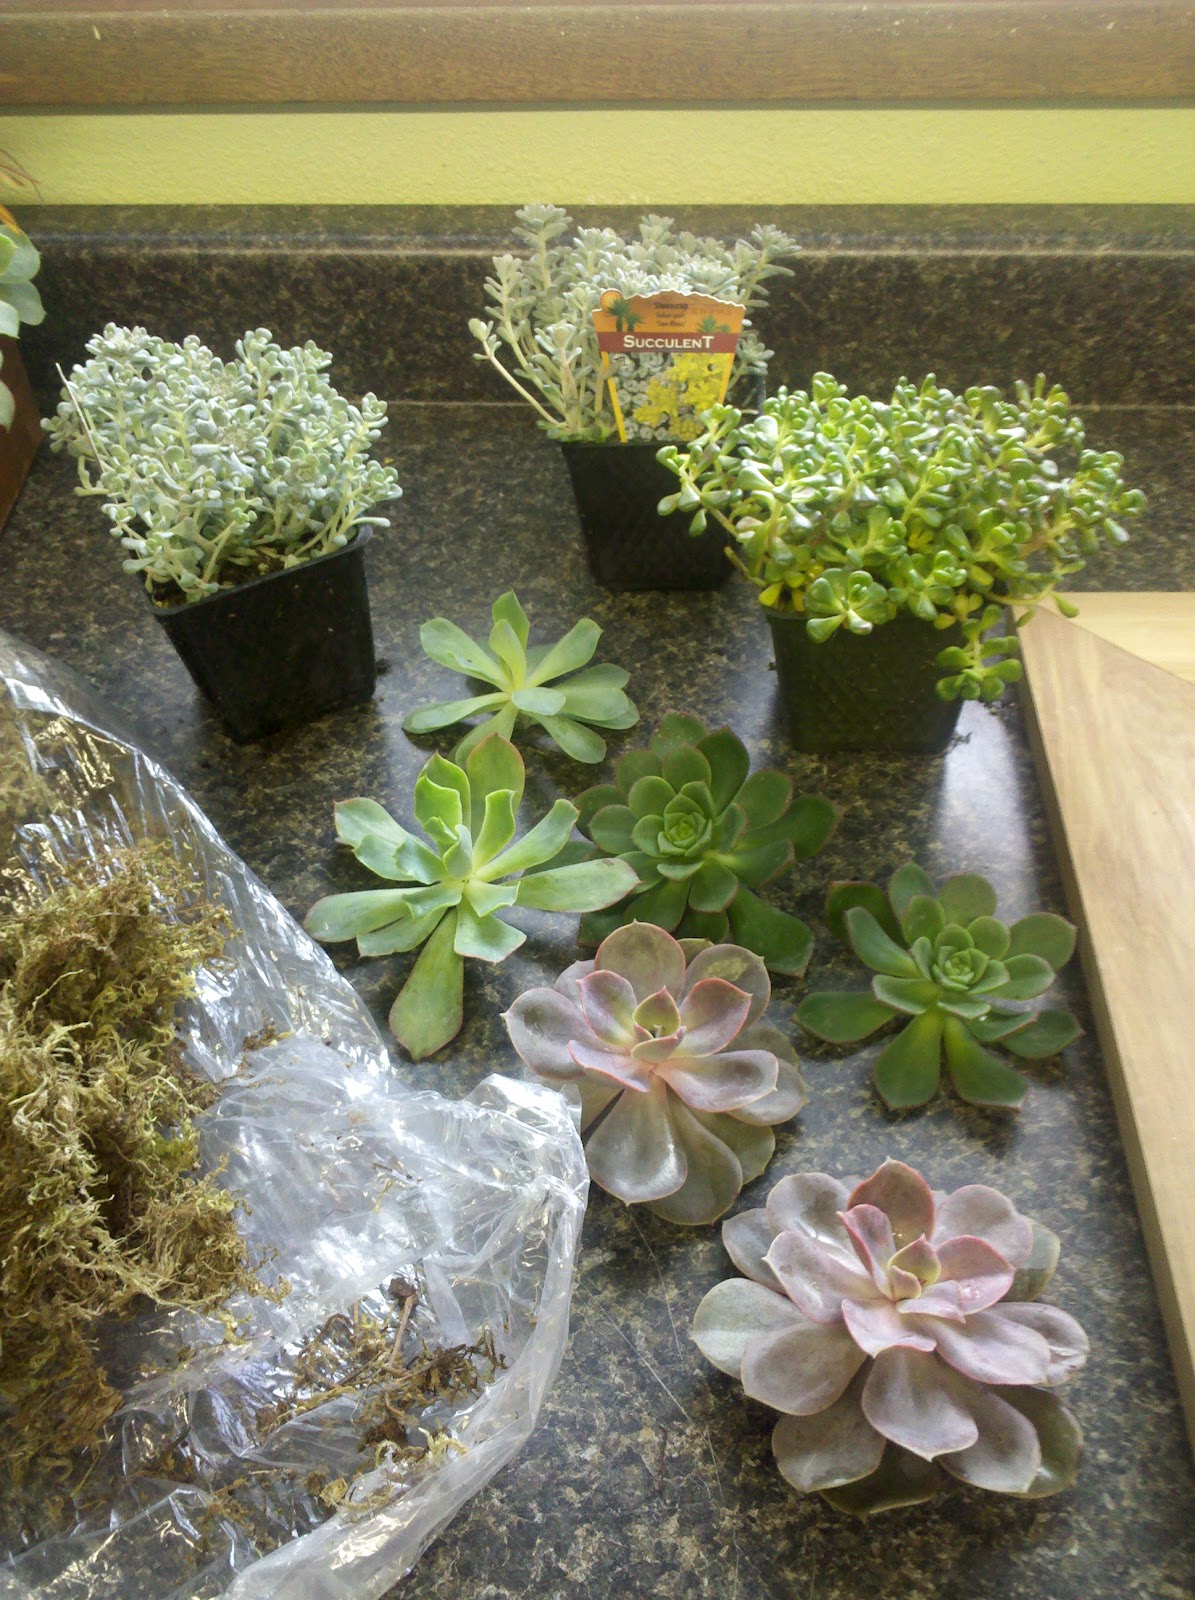
How to create a Succulent Frame
Succulents are a big trend again this year in Weddings and Events or even just decor for your home. They are durable and hearty, fairly inexpensive and overall make a big statement to any event. Create something unique for your Wedding, Party or just for the home!

What you'll need:
* Wood, cut to the size of frame you decide (you can use an old frame or purchase an already frame as well)
* 4 L brackets size depending on the size of frame your using ( you only need these if you are making your own frame- if you've purchased or are using an old frame you don't need these)
* Green Felt
* Cardboard
* Glue Gun
* Frame hardware for hanging
* Assortment of Succulents
* Moss
* Small nails
Directions:
1. To create the frame cut your wood to size with angled ends to fit together to make a square or rectangle. Attach with wood glue and/or nails. Finished product below.

2. Attach L brackets for additional stability of the frame.


3. Attach felt to back of frame with glue gun.

4. Cut cardboard to size and attach to the back of the frame with small nails, all the way around the frame. (Tip: Be sure the nails are small and short enough that won't split the wood and poke through to the front of the frame)


5. Add hanging brackets to the top of the frame for easy hanging later on. (Tip: Be sure to do this now, it will be much more difficult to do it later when all the succulents are attached to the front of the frame, you'll risk crushing the plants)


6. Put our all your succulent varieties and start thinking of your design plan. Remove larger succulent flowers from their pots and cut the blooms off the stem so you can easily glue them flat to the frame.
7. Arrange and hot glue gun moss around the edges of the frame and blobs scattered in the middle of the frame as well. You will add more moss later to cover any felt showing after all the succulents are attached. It's good to have a combination of colors and sizes of succulents for variety in depth and texture.

8. Start arranging your succulents on the frame (DON'T GLUE YET). Lay out your general design before gluing so you don't have to remove them later. Once you've figured your general design start gluing the succulents to the felt and moss. Use a generous amount of glue on the bottom of the plant and press gently down onto the felt. Press down for approximately 30 seconds or until glue is dry to stay attached.
(Tip: You may need to glue some of the petals of the succulents to the felt if they droop when you stand the frame up)

9. Continue this process until the frame is filled with all the succulents it can fit and you are happy with the design.

Hang it at your Wedding, Event or Party! Use colorful ribbon to hang it or attach it to something. This one was used as the start of the aisle for the Wedding Ceremony. Then later at the reception as the Bride and Groom's chair backs.
You can hang several of them or one large one as a backdrop to an Altar or do smaller ones as a centerpiece for a table. Make one to hold your escort cards or attach wish cards as a guest book to it. There are endless possibilities and your guests will be very impressed and the uniqueness and creativity this brings to your event.

This photo provided by: Jenny Jiminez Photography
Most of all HAVE FUN AND BE CREATIVE!
This project is for short term use only. If you want to create a hangable succulent garden that will last for a long time to come. Check out this how to here: http://www.luna-see.com/2010/11/diy-tutorial-vertical-framed-succulent.html
Subscribe to:
Posts (Atom)